Aloha:
Bueno vaya que vamos lentas, pero no siento que eso sea taaan malo, porque aun despues de todo he visto que siguen preguntando por el proyecto, he pensado en que si para enero no hay nada que lanzar definitivamente se tendria que reconsiderar en seguir o no.
Hay muchas cosas que aun no me quedan claro, no entiendo el tema "Mas que letras"..es decir mas que letras, a que se refiere exactamente? si vamos a manejar un tema base cada mes cual es el tema base del primero?
Una cosa que tambien me confunde es , si vamos hablar de la pelicula Antes de que anochezca, y se supone se maneja un tema lineal de base, entonces porque voy hablar de los soundtracks de las peliculas de Almodovar?,que tiene en comun? alomejor me pongo un poco complicada o mamona, pero eso mismo quiero y que ustedes me den pelea! que se involucreen que me expliquen y llegar a algo positivo para el proyecto.
"Mas que letras" me suena a una investigacion sobre un ESCRITOR, pero no me suena a nada que tenga que ver con una operacion trans, con salir del closet o con Almodovar, pero si piensan que estoy un poco distraida haganmelo saber y tambien el tema principal del primer programa porque honestamente creo que ni nosotros mismos lo tenemos muy en claro y eso esta de alguna manera frenando el proyecto. Gracias
P.D. URGE UNA JUNTA
Sire.

Tuesday, November 2, 2010
Sunday, September 19, 2010
Nuevo Calendario de TODO... LEER!
Nenas a Bordo:
Aki Les dejo un Rough Draft de nuestro nuevo calendario como saben he estado en Tecate sin poderme mover mucho pero apartir de la sema que viene ya me quedare un ratotote en San Ysidro.
No habia podido enfocarme en el proyecto como quisiera pero si he hecho mi trabajo en casa no se preocupen espero ustedes tengan algo listo.. aqui les dejo las nuevas fechas
Al parecer no se nos hizo lo de el 15 de septiembre asi que movi todo al 15 de octubre esperando ahora si poder entregar nuestro primer blocke a tiempo.
aqui les traigo un rough draft de las fechas para ya no perder ninguna fecha limite.. apunten .
FECHA DE LANZAMIENTO:VIERNES 15 DE OCTUBRE 2010
- Preproducion: (para reunir storyboards, research concreto ) del 15 de septiembre al Jueves 23 de Septiembre
- Junta proxima Sabado 25 sept
- Produccion (grabacion, entrevistas y actuacion) del Viernes 24 de septiembre al Domingo 3 de octubre
- PostProd: (edicion and final details) Lunes 4- Martes12 octubre
- Promocion en linea y social : del 13 al 14 de octubre
- Lanzamiento Oficial 15 de octubre
- Seguimiento de promocion 16 - 17 de octubre
- 18 de octubre:preparar siguiente blocke para el 15 de Noviembre.
Asignaciones de Pre-Produccion
Armida:
- Storyboard de su seccion morada (necesitas dibujarla como te la imaginas que la iras a presentar y con tus lineas de dialogo musica de fondo y todo)
- Research Seccion Azul te toca el efecto psicologico en una persona que pasara por el procedimiento de cambiarse de sexo.
- Alistarte para salir a entrevistar a los actores de el sketch rosa ( te tocara hacerle las preguntas a la mama, amigo, coworker de la persona gay que no sabe que es gay)
Nadia:
- Storyboard para seccion morada el libro o autora que escojiste dibujalo como quisieras que saliera en pantalla ya editado con sonidos de fondo y estilo de presentacion
- Research seccion azul (preparar entrevista con preguntas a la persona que escojieron o escojeran que planea cambiar de sexo o que ya lo hizo)
- Prepararse para actuar en seccion rosa
Magda:
- Si quieres hacer una presentacion de algun tipo de arte ya queda libre la categoria de una obra de teatro o un blog de alguien (maybe your cousin) o artista que quieras recomendar tienes que tener el storyboard listo para la fecha limite y tiene que tener algo de contenido gay.
- Research seccion azul (preparar entrevista con preguntas a la persona que escojieron o escojeran que planea cambiar de sexo o que ya lo hizo)
- Pasar el coctel de sonidos a un disco externo o usb.
- Prepararse para actuar en seccion rosa
Sandra:
- Storyboard de seccion morada
- Tener lista la info para contactar al dr que le haremos la entrevista para el cambio de sexo
- Ayudar a la elaboracion de el storyboar de la seccion rosa y roja
Mirna:
- Storyboard de seccion morada, rosa y roja
- research de intro de la seccion azul
TODO ESTO ESTA CONTEMPLADO Y DUE PARA EL JUEVES 23 de SEPTIEMBRE
si lo tienen antes mandelo por correo o como sea que lo tengan presentado para hacerle fecha de grabacion o arreglos.
Junta proxima Sabado 25 sept (please confirm)
Temas a tratar:
- Acomodar fechas de todas las producciones que siguen
- Acomodar bien los storyboards de todas las secciones
- grabar si se puede alguna cosa ese dia ya sea intro o entrevista, o parte de sketch
Production Assignments 24 sep-3 de octubre
Armida:
Grabar seccion morada ( acomodar fecha) si quieres que aparescan imagenes o musica en tu seccion tenerlas listas en usb o cd.
Tenes libre la fecha para grabar el sketch
Nadia:Grabar seccion morada ( acomodar fecha) si quieres que aparescan imagenes o musica en tu seccion tenerlas listas en usb o cd.
Tener lista la fecha y la persona para grabar en la seccion azul
Actuacion en sketch rosa
Magda:
Estar disponible con equipo para fechas de grabacion
Grabar seccion morada ( acomodar fecha) si quieres que aparescan imagenes o musica en tu seccion tenerlas listas en usb o cd.
Tener lista la fecha y la persona para grabar en la seccion azul
Actuacion en sketch rosaSandra:Grabar seccion morada ( acomodar fecha) si quieres que aparescan imagenes o musica en tu seccion tenerlas listas en usb o cd.
Tener lista la cita para entrevistar al dr
bueno mas o menos asi es la cosa espero poder verlas este sabado 25 de septiembre para acomodar todo esto.. love ya ladies!
Friday, September 3, 2010
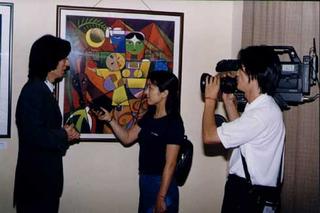
A entrevistar se ha dicho
Al momento de realizar una entrevista es importante tener en claro lo siguiente.
Porque fue elegido el entrevistado y sobre todo lo que se espera lograr con esta conversación, esto puede ser:
·Conseguir una revelacion!
·Que realize una denuncia
·Mostrar una faceta desconocida de un personaje conocido
·Que se explaye en un tema de interes para el publico(caso pasjae rodriguez y sus locatarios)
·Mostrar su personalidad atravez de la entrevista
La actitud del entrevistador debe ser:
·NATURAL y DESAPERCIBIDA para poder lucir a nuestro entrevistado.
·Crear cierto clima de intimidad para hacer sentir comodo a nuestri entrevistado, sin olvidar el objetivo de la entrevista y que esta es para publico abierto.
·La inteligencia de las preguntas marca la calidad de las respuestas (y por lo tanto de la entrevista.)
Abrir con quien eres y que haces
1.- ¿Quienes son Las Hijas del Cuarto Oscuro y que hacen?
A mi opinion es mejor desarrollar la entrevista como una charla, mas que las clasicas pregunta respuesta, la charla es mucho mas flexible pero hay que tener mucho cuidado en no desviarse de el objetivo , del tema y empezar a platicar de otras cosas.
Para hilvanar la entrevista se podria utilizar ..Ho! enserio, y desde hace cuando que se conocen como?
2.- Que es el arte en su punto de vista?
3.- Que sentimientos fotografian ? ya sea cada una de ellas o si solo es una preguntarle ke fotografia ella personalmente.
4.- Hacen participaciones con otros equipos de aqui del pasaje rodriguez, Que tal ha sido la relacion entre, ha funcionado como apyo entre unos y otros ?
Aqui destacar la relevancia de encontrarse todos en un mismo punto de expresion.
5.- Fue dificil el proceso anterior a la ingaguracion del lugar? y despues
6.- Como ven al mercado de arte en esta ciuda? Creen que el echo de ser Frontera sea una ventaja o desventaja de alguna manera, como?
7.- Platicanos quienes se han presentado en su galeria, y que hay que hacer para poder estar aqui en exhibición? informacion para el publico nunca falla como interes general :)
y no hay que olvidar que es una entrevista donde el entrevistado se debe explayar sobre un tema que conoce en este caso fotografia y el nacimiento del Pasaje Rodriguez.
8.- El proximo 10 de Septiembre supimos que da inicio un taller de fotografia documental,cuentenos un poco de ello , quien lo imparte? A quien va dirigido?
Hay que mostrar honesto interes por lo que te esta contando el entrevistado, de ahi que olvides hasta cierto punto el echo de que es publico y sientete como en una charla intima
9.-Que viene para Las Hijas del Cuarto Oscuro? (como galeristas, fotografas y como personas)
10.- Por ultimo preguntas de responde loprimero que pienses :) se toma como "recomendaciones del artista"
Musica?
Libro?
Fotografo?
Que te inspira?
Cerrar agradeciendo el tiempo y la confianza de compartir. esperando volver a vernos pronto!
De igual manera yo medespido esperando verlas compañeras pronto, ojala algo les sirva de algo ya saben que todo esta sujeto a aprobacion y modificacion del equipo;)
el vino de caja ya hizo su efecto, me retiro a dormir.
Sire.
Aloha Muchachada :
Ell proximo sabado no voy a poder estar ahi, (por la mañana), pero no quize dejar pasar la oportunidad de escribirles algo de lo que, a mi maña investudie un poquito espero les sea de utilidad en algo , no estan pa saberlo ni yo pa contarlo, pero el miercoles pasado tuve mi aventura ·tramite pasaporte toma 2· y debo cubrir ese dia en mi jale con el sabado..pfff.. en fin.
Ok morras,de entre las cosas que encontre ke me parecio importante fue que es una regla en todo proyecto colectivo tener una linea de presentacion, estilo "mision de la empresa" claro , sin caer en ese horrible termino que suena a aquello que te obligaban aprenderte en los trabajos(o solo a mi?  ).
).
Es decir tener bien en claro quienes somos que hacemos y hacia donde vamos, ya que esto nos va ser preguntado constantemente por la gente que en un futuro deseemos entrevistar, y no queremos vernos contestando respuestas vagas que poco tuvieran que ver con el proyecto o cada quien contestando algo totalmente diferente , ya que siento que esto nos haria ver como si no hubiuera conexion ni comunicacion en el equipo y un proyecto asi no da mucha confianza.
Escribi esta presentacion teniendo encuenta que ya este sabado es lo de "Las Hijas del Cuarto Oscuro" ya posteriormente en junta comentamos el hacerle algunos cambios o ajustes si hay alguna idea que no les parece que vaya con el grupo e incluso rechazarlo, decir..no mames sire..ke mamada es esta!. Siempre tomando encuenta que todo el equipo este deacuerdo con el resultado final de la misma.
ok seguna lo que yo investigue hoy arme algo asi ...
Buenas (dias, tardes, noches, madrugadas salud!) :
Mi nombre es...... (presentarse).... y estamos trabajando (porke de echo aun no existe, literalmente.)en un proyecto llamado "Bajan en la esquina", es un canal en linea hecho por y con un ligero enfoque hacia la comunidad LGBT (aki todavia difiero un poko sobre el tema, pero en fin, esta decidio que ese es el tinte en el que se marina el proyecto , no es asi?. A si que me parece honesto e importante mencionarlo en la presentacion.).
Entre los temas de interes que tratamos se encuentra el difundir espacios donde se apoya el arte como expresion, Ahora mismo estamos trabajando en el Pasaje Rodriguez y quienes en el participan actualmente(es una breve explicacion porque seguramente pensaran .. y que tengo yo que ver con un canal LGBT y tambien hacemos referencia a el interes de el canal porTODO tipo de exprecion artistica, llamese, cine, foto, literatura, pintura, graffiti o los ya tipicos monederos chuscos que hace la morrita con material reciclado, gente que CREA en general ) y pasaran a ser parte de la historia como sus fundadores(alago amable y honesto).
Evitemos totalmente la palabra "cultural" por donde quiera que lo vi es un termino incorrectamente usado para referirse al arte como expresion, el termino cultural se limita a un grupo de ideas conocimiento o habilidades transmitidos de generacion en generacion, mucho tiene que ver con la antropologia y poco con un canal online de temas variados, y personalmente siento que la palabra como tal, se ha venido utilizando como un esnobismo.
Un ejemplo armado, (utilize nombre ficticio de compañera pa ke nadie se sienta  )
)
Se leeria asi...
Buenas Noches, Mi nombre es Sire y ella es mi compañera Lady Gagalupe, estamos trabajando en un proyecto llamado "Bajan en la Esquina" es un canal en linea echo por y con una ligera orientacion hacia la comunidad LGBT.
Entre los temas de interes que tratamos se encuentra el difundir espacios donde se apoya el arte como expresion, Ahora mismo estamos trabajando en el Pasaje Rodriguez y quienes en el participan actualmente y pasaran a ser parte de la historia como sus fundadores.
Tengo entendido que hoy por la noche tendran una exposicion de Juan Perez el camionero y quisiera saber si hay posibilidad de hacer algunas tomas y asi mismo llevar acabo una charla/entrevista con Uds. para conocer mas en particular de "Las hijas del Cuarto Oscuro" y lo que encontraremos al visitar su Galeria.
Segun lo que entendi las lineas de presentacion tiene que tener estos cuatro puntos.
Directo, Claro,Corto y Sencillo.
Espero esto sirva de algo, si no ya lo comentaremos en proxima junta.
Olas de Abrazos.
Sire.
Thursday, September 2, 2010

Thursday, August 26, 2010
Segunda Junta: Nombre e Imagen

La junta de este miercoles 25 d agosto en linea termino con nombre para el proyecto
Bajan en la esquina.. arriba hagan click para ver mas grande la imagen y escojer una font para el logo y un estilo.. si quieren que bajan sea mas grande en la esquina abajo mas chico aun lado en angulo ustedes escojan 4 letras que les guste y aporten ideas...
Terminamos deacuerdo en el nombre de Bajan en la esquina y tenemos ya un blog, facebook, myspace, gmail con el mismo nombre. para completar necesitamos la imagen completa.
Cosas que concordamos esta ultima junta:
La seccion rosa sera un sketch quer falta por planear
- El video de presentacion de el proyecto sera un colectivo de imagenes y gente diciendo muchas palabras de lo que es Bajan en la esquina.
- El intro que sera usado al principio de el primer blocke sera un coctel de sonidos editado con imagenes de tijuana
- El estilo de grabacion sera sin mucha presencia de nosotros excepto en los reportajes y entrevistas el resto sera edicion excepto por la secion morada de arte interno donde podemos ser mas creativos y usar green screen un set o algo creativo.
- las cortinillas o separacion de video a video sera una estatica con filtro de el color de la seccion.
Proxima Junta sera el Lunes 31 de agosto en linea y los pendientes son los siguientes:
Concordar junta para grabacion de coctel de sonidos fotografia para meter en intro
Spots sugeridos a grabar:
- la linea (el wey que pide los trolley tickets pa revenderlos)
- las puertas de fierro giratorias que suenan cuando pasa la gente
- los de el taxy amarillo diciendo : 'taxy seniorita'
- comida, cocos, tamales, tacos lista de tacos varios, los del el camion diciendo para donde van (postal correo murua centro) alguien preguntando al taxy libre cuanto a la plaza rio y que conteste... etc etc.
Tener lugar de los monchis listo e investigado con fechas para ir a grabar al igual que el pasaje rodriguez y sus negociantes.- Tener un resumen o una delanto de el research para la seccion azul : Legaly Trans (concordar lugares donde grabar)
- Todos tener listo su seccion correspondiente para la seccion morada ya lista para planear como grabar
- ponernos de aceurdo como presentar seccion roja y como filmarla
Proxima Cita para grabar lo mas posible es el 4 de Septiembre
Wednesday, August 25, 2010
Tips y Green Screen Tricks
What to wear when you are on camera
Please don't wear:
Please do:
* Large amounts of white or very light pastels
* Large amounts of red or black (jackets, skirts, dresses)
* Very bright, shiny jewelry
* Fabrics with narrow stripes, polka dots, or tiny patterns with high contrast (black & white herringbone)
* Harsh makeup, very short skirts or shorts
* Don't get a haircut the day before the video shoot
Please do:
* Wear pastels, pinks, blues, greens, browns, golds (red, black and white in small amounts)
* Wear regular street makeup
* Wear jewelry that is not very shiny
* Bring compact (powder), blush, lipstick
* Make sure hair is neat* Bring some liquid makeup in case one of the male cast members has a skin blemish
Greenscreen tips and ideas
Greenscreen, chromakey, bluebox, keying....all different words for a technique used to layer one image over another. And keying is almost as much an art as it is a science.
We've just finished taping about six weeks worth of television and radio newscasts for speech contest, and in the process, we've had about every technical problem possible occur. Right now, I'll concentrate on some things we've learned about greenscreening.
We used greenscreen for weathercasts and for a virtual background for sports and special features, and keyed the background whike shooting (as opposed to keying in post production). These ideas apply to both situations.
1. Lighting. If possible, light the screen separately from the talent. Your goal is to create a flat, even light on the screen. Shadows or light and dark areas all make a clean key more difficult. which brings us to...
2. Distance. Have your talent at least three feet away from the greenscreen. Any shadow that falls on the screen will mess up your attempt to key. So, if you move the talent farther away from the screen, their shadow falls on the floor instead of on the screen.
3. Put your camera on manual focus, and then focus carefully on the talent. The easiest way to do this is to zoom in to the talent, focus, and then zoom back to the desired focal length. This throws the background out of focus, which hides wrinkles and imprefections in the greenscreen.
4. Set your camera to manual exposure. If it's on auto-exposure, then any change in the exposure setting will mess up your key. Something as simple as the talent holding up their script can change exposure, which changes your key, which drives you crazy. So, switch to manual exposure.
5. Wardrobe. I've had good luck with the talent wearing darker colored clothing, but to be safe, I ask them to bring two outfits...if one doesn't key well, perhaps the other one will. Also, stay away from frizzy or spiked hair-dos. That irregular edge will give your talent a green halo.
6. Weather maps or backgrounds should be a darker color. If the JPEG you are keying is white or a light color, any green fringing is obvious to the viewer. A darker JPEG helps to hide fringing.
7. Place a monitor on both sides of your talent. If the camera is at 12 o'clock and your talent is at 6 o'clock, you should have a monitor at 10 and 2 o'clock. These monitors should show the chromakey output, so the weatherperson can see what the heck they ar pointing at.
8. Let your talent practice before you shoot. Pointing out in thin air and hoping you are pointing at Phoenix or Pittsburg takes some practice. Let them get the feel of this virtual world before the cameras roll.
And finally, take your time. It seems like taping a weathercast is one of the most stressful jobs when producing a TV newscast. So don't assume you can crank out a five minute weathercast in ten minutes. Plan enough time to keep your talent (and you) from stressing out.ILUMINACIONeste es un slide para ver en donde pueden ir las luces o como podemos acomodarnos para tener mejor iluminacion

Taller de Produccion
A filmar se ha dicho
para filmar necesitaremos orden y un plan tambien desde como tomar la camara y como tener orden en las tomas y tenerlas anotadas
Production (shooting your video)

Here is where the fun really starts. With a script in one hand and a camera in the other, you start actually shooting scenes for your video project.
Some tips will help your shoot go smoother and be more productive. Before the day of the shoot, look at that camera. You need to know how to operate it, and that’s more than just grab, point and shoot. Learn what the buttons do; for gosh sakes, learn how to turn off the day/date indicator. Nothing makes a project look more amateurish than having “August 14, 1987” in the corner of every shot. So, don’t bother setting the correct day and time, just turn that silly feature OFF.
Many cameras shoot in two different speeds, one for best quality and one for lower quality but longer recording time. Right now, I’m looking at a Panasonic miniDV tape that says 60/LP90. That means that it records 60 minutes at full quality, or 90 minutes in the lower quality Long Play (LP) mode. Whenever possible, use the higher quality recording speed setting, that is, the one that uses the tape the fastest. If you’re using a 60/90 minute tape, record at the 60 minute setting. (And since you learned what all the buttons do on your camera like I mentioned in the last paragraph, that will be a snap, right?)
Make sure your camera batteries are fully charged if you aren’t using AC current to power your camera. In fact, find a spare set of batteries and charge them as well.
Are you recording sound? Do you have a hand-held mike that will plug in to your camcorder? From experience, I know that a $20 mike placed close to your subject will sound better than a $100 mike that is 20 feet away. And if you are only using the on-camera mike, well, you are in trouble. Later in this series, I’ll post an article about shooting with the on-camera mike. For now, find a hand-held mike, plug it in to your camera and keep it close to the source of your sound.
Are you using a nice, fluid-head tripod? Whenever possible, use a tripod!
Always use new tapes for your project; it’s a very small investment that will help you succeed. If you are using miniDV tapes, you might want to exercise them first by fast-forwarding all the way to the end, and then rewinding them to the beginning. I’ve found this reduces any “drop-outs” in the picture.
When you are shooting video for later editing, you have two tricks up your sleeve.
1. You can shoot more than one take of a scene. That is, you keep doing it until you get it right.
2. You can shoot out of sequence. For instance, if you are doing a TV newscast, you can shoot the sports first and put that scene in the proper part of the newscast during editing.
All right. You are out in “the field” with your actors, your camera operator, and somebody to help haul everything around. You have a well planned script with every camera shot written down or storyboarded.
Here are some camera operator tips.
A. Frame your shot. Zoom in or out to frame the shot you want.
B. Pre-roll on each shot. Let camera roll 10 seconds before action starts.
C. Identify each take while the camera is rolling. "This is Take 1" “This is Take 2” etc. Use a clapboard for this, as well as having someone say it out loud.
D. Hold it! Keep your shot for at least 20 seconds. Don’t shoot tiny snippets of action.
E. Don't pan and zoom unnecessarily.
F. Keep the mike close to the subject, so you can hear them.
G. Post-roll on each shot. After the shot is done, let camera roll for at least another 10 seconds before stopping.
Pre-roll and post-roll are essential! Every time you start that camera, let the tape roll at least ten seconds before the action starts. And let that tape roll an additional ten seconds after the action stops before you stop recording.
If you decide that Take 3 is the best take of the first scene, Take 2 is the best of the second scene, and Take 8 is the best of the third scene, be sure to write that down on your script. Why do we have each scene identified with a “take number? When you are editing, it makes it easier to assemble your project in post production.
As an example of how easy this makes editing; imagine editing a scene into our project. Which take do we use on this particular scene? Take 3 because I wrote that down on my script. How do I identify Take 3? It’s right there on the clapboard at the beginning of the scene.
Hand holding your camera
There are some times that you just can't use a tripod while you're shooting video. Here are some techniques to get the best possible footage while hand-holding your camera.
The primary rule of a hand held shot is DON'T USE THE ZOOM. A zoom lens magnifies the image...it also magnifies any camera movement or shake. So, instead of zooming in to fill the viewfinder, zoom back and get very close to your subject.
This has another benefit. If you are hand holding the camera, zoomed back to a wide angle setting, and are a couple of feet away from your subject, then you can capture very good audio with just the on-camera mike. I've seen professional TV ENG crews doing simple interviews like this.
If you can't get close to your subject and don't have a tripod, there are a couple of tricks you can use. Wherever possible, set the camera down on something--a wall top or railing, a table or
bookcase--any horizontal surface. To see what you're shooting, angle the viewfinder upward so that you can look through it .
If you can't steady your camera by one of these methods, try to brace yourself as you hand-hold it. Again, lean against a vertical support or prop your elbows on any handy horizontal surface. For low angles, try kneeling rather than squatting.
Here are some other good hand-holding techniques. Such as:
The primary rule of a hand held shot is DON'T USE THE ZOOM. A zoom lens magnifies the image...it also magnifies any camera movement or shake. So, instead of zooming in to fill the viewfinder, zoom back and get very close to your subject.
This has another benefit. If you are hand holding the camera, zoomed back to a wide angle setting, and are a couple of feet away from your subject, then you can capture very good audio with just the on-camera mike. I've seen professional TV ENG crews doing simple interviews like this.

If you can't get close to your subject and don't have a tripod, there are a couple of tricks you can use. Wherever possible, set the camera down on something--a wall top or railing, a table or
bookcase--any horizontal surface. To see what you're shooting, angle the viewfinder upward so that you can look through it .
If you can't steady your camera by one of these methods, try to brace yourself as you hand-hold it. Again, lean against a vertical support or prop your elbows on any handy horizontal surface. For low angles, try kneeling rather than squatting.
Here are some other good hand-holding techniques. Such as:
Hold the camera with both hands, elbows spread away from the body so that they can act as shock absorbers. You can hold your elbows tight at your sides for extra bracing.
If the shot won't run very long, hold your breath. Take a deep breath, let half of it out, then hold the rest and shoot.
If you pan the camera, stand with your feet parallel to the middle of the movement, then twist your upper body back until you can frame the beginning.
Remember, shoot hand-held footage with the lens at the widest angle setting you can. Remember that wide angle lenses tend to minimize the effects of camera shake.
ORGANIZACION EN ANOTAR LAS TOMAS
Multiple takes & logging while shooting
When working on a video project, I always go through the three basic steps:Pre-production (planning)
Production (shooting)
Post-production (editing)
The key to success in a video production is organization. And I'm a rather disorganized person, so I'd like to skip that part and just keep all that information "in my head." But I've learned the hard way that a little organization during the planning and shooting stages makes life a lot easier when it comes time to edit.
In class, I always do a simple demonstration of logging an interview while taping it, to show students some techniques that make the whole process easier. It goes something like this:Ed: "I need two students to help with this demo." And I grab a couple at random, asking them to come to the front of the class with me.
Ed: "All right, we're shooting an interview with Jenny. I'll have her stand in front of the camera, and Bret will be my gaffer." With this, I hand Bret a pencil and paper.
Ed: "Every videotape that I shoot needs a name. We'll label this tape as 'Jenny.' So I want Bret to write 'Jenny' at the top of his piece of paper. This is our Tape Log."
Bret writes this down and waits for further instructions."I'll start the camera rolling. Remember that we need 10 seconds of pre-roll before the action starts. While the camera is rolling, I'll ask Jenny to say and spell her full name."
Jenny looks at the camera and says, "Jenny Jones. J-e-n-n-y J-o-n-e-s."
Ed: "Very good. Jenny, I'd like you to hold up one finger, because this is Take One of the interview." Remember that the camera has been rolling during this.
Jenny holds up one finger for a minute. We're ready to start."All right, everyone 'stand by." This is Take One, coming in 5-4-3-2...."
And I don't say "one" because I want a moment of silence there before we begin.
I ask Jenny a couple of questions, and then I cough or clear my throat while she gives me her reply. Ah. A ruined take. I look at Jenny and say:Ed: "I'm sorry. Guess I messed up that take. So Bret, would you write down 'Jenny interview Take 1, no good.'"
Bret does this and we continue.Ed: "Note the camera is still rolling. Tape is cheap, so we don't bother stopping the camera or rewinding the tape between takes. Jenny, please hold up TWO fingers, so we know this is Take 2."
She does so. Bret writes down "Jenny interview Take 2" on his paper.
We do another take of the interview, and we successfully complete it. I look at Jenny and Bret.Ed: "Were you happy with that take? Was that all right?"
They think it was fine.Ed: "OK. The camera is still rolling, and we know it's been at least 10 seconds since Jenny finished. I'll turn the camera off, and I'd like Bret to mark 'OK' next to 'Take 2' on his log sheet."
Bret does so, and I thank both students as they go back to their desks.Ed: "Class, when we've finished shooting everything, we'll take a big stack of tapes into the editing suite to begin putting this project together. At some point, we'll look at our script and want that interview of Jenny."
Ed: "Where do we find it?"
And the students reply, "On the tape labeled 'Jenny.'"
"What take do we want to use?"
Students: " Take 2."
Ed: "And how do we know that?"
Bret: "Because I wrote it down."
Ed: "How do we know which take is Take 2?"Jenny : "Because I held up two fingers while you were taping to show it was Take 2."
If you use the technique of logging your takes and selecting the "good" take while you shoot it, you save a lot of effort and frustration when it's time to transfer the good stuff to your editor.
Taller de Pre-Produccion
Taller de Pre-Produccion
Hola chamakotas encontre una pagina para estudiantes de 12th grade que llevan un aclase de produccion y yo les pondre aqui los merjores tips que nos serviran a nosotros de este BLOG
Esta en ingles asi que buen punto pa Homie y las demas pues intentemos comprender lo mas
posible
Antes que nada este taller explica como planear y hacer un video
hay 3 pasos para lograrlo llamado pre-produccion ( donde lo planeamos y entra el script el sotyboardsgoals and objectives of your video, target audience, treatment, and budget
la produccion donde ya hacemos el video basados en lo de arriba
y Post Produccion Editarlo sonidos arreglos estilos subirlo a chutub :P
Primer Parte
Pre Produccion y Scripts
Materiales a necesitar:
Template de script ( un templates es una base ya diseniada o hecha de lo que sea que te ofrecen)
Template de Storyboard los links lo tengo en el Tab de Recursos ahi tengo links para storyboards y proximamente uno de script tratare de imprimirlas y repartirles para la proxima junta.
Writing a script can be daunting, but there is an easy way to work through the process.
Outline
Start by writing an outline. List every major point you wish to make on your video. Remember the old method of writing a script:
Which translates to Introduction, Body, Summary. So, your XYZ School outline might look like:
I. Introduction
A. Several long shots of school exterior
B. Shots of interior, physical plant, students and teachers interacting
C. Some two-shots of student-student, student-teacher, teacher-teacher
II. Our new building
A. Brief history of construction of building
B. Swimming pool, little theatre
C. TV studio and production facilities
D. Up-to-date internet access, CATV television system in building
III. Fine arts at our school
A. Music department
B. Drama
C. Speech
IV. School spirit
A. Pep rallies
B. Student council meetings
C. Several shots of students and teachers at sporting event
D. Annual car wash fundraiser for charity
V. Summary
A. What have we seen?
B. What have we learned?
C. For these reasons and more, XYZ School is the perfect educational environment for your student
Notice what we did here. We took the objectives from earlier and used them for our main talking points. It's starting to take shape.
Prepare a script
Here is a big secret in producing a video. You only have two things to work with: picture and sound. So when scripting, what will we see and what will we hear?
Your script is narration and accompanying pictures, word for word. Some people use a storyboard, where they sketch the pictures wanted while writing the narration, sound effects or music.
Other people prefer creating a two-column script, with a description of the pictures used on left (this also includes the titles), narration or music listed on the right.
We all have an idea of how to write the audio (or sound) portion of the script. It's a lot like writing the reports that we've all done in school. One difference is to write for the ear. That is, select words and phrases that are pleasing to the ear, since this will be delivered aloud. Save your flowery prose for another time.
For the video (or picture) column, list every video shot you want. Note if it is a wide shot, medium, close-up, or extreme close-up shot. Be sure to use a lot of different video shots. During narration, you might change shots as frequently as every five seconds or so.
Outline
Start by writing an outline. List every major point you wish to make on your video. Remember the old method of writing a script:
Tell them what you're going to tell them
Tell them
Tell them what you told them
Which translates to Introduction, Body, Summary. So, your XYZ School outline might look like:
I. Introduction
A. Several long shots of school exterior
B. Shots of interior, physical plant, students and teachers interacting
C. Some two-shots of student-student, student-teacher, teacher-teacher
II. Our new building
A. Brief history of construction of building
B. Swimming pool, little theatre
C. TV studio and production facilities
D. Up-to-date internet access, CATV television system in building
III. Fine arts at our school
A. Music department
B. Drama
C. Speech
IV. School spirit
A. Pep rallies
B. Student council meetings
C. Several shots of students and teachers at sporting event
D. Annual car wash fundraiser for charity
V. Summary
A. What have we seen?
B. What have we learned?
C. For these reasons and more, XYZ School is the perfect educational environment for your student
Notice what we did here. We took the objectives from earlier and used them for our main talking points. It's starting to take shape.
Prepare a script
Here is a big secret in producing a video. You only have two things to work with: picture and sound. So when scripting, what will we see and what will we hear?
Your script is narration and accompanying pictures, word for word. Some people use a storyboard, where they sketch the pictures wanted while writing the narration, sound effects or music.
Other people prefer creating a two-column script, with a description of the pictures used on left (this also includes the titles), narration or music listed on the right.
We all have an idea of how to write the audio (or sound) portion of the script. It's a lot like writing the reports that we've all done in school. One difference is to write for the ear. That is, select words and phrases that are pleasing to the ear, since this will be delivered aloud. Save your flowery prose for another time.
For the video (or picture) column, list every video shot you want. Note if it is a wide shot, medium, close-up, or extreme close-up shot. Be sure to use a lot of different video shots. During narration, you might change shots as frequently as every five seconds or so.
SIGUIENTE PASO
ya que tenemos esto
A. Goals.....................What is your video about?
B. Objectives...............Things your audience will recall
C. Treatment...............How will you tell your story?
D. Target Audience........Who will watch this?
E. Budget...................How much time & money?
2. Write an outline. List every major point you wish to make on your video.
3. Prepare a script. You can also do this visually on a storyboard. List every shot you want. Note if it is a wide shot, medium, close-up, or extreme close-up.
RECUERDEN SEAN VISUALES EN TODO IMAGINENSE EL TRABAJO TERMINADO Y COMO PODRIAN FACILITAR TODO AL EDITOR CON SUS IDEAS DESCRIBAN CON DETALLE TODO LOS POSIBLES PROCEDIMIENTOS EN LOGRAR QUE SU IDEA SEA PRODUCIDA POR UN TERCERO.
TIPO DE TOMAS para tener en consideracion cuando haces el script y cuando filmas
Camera shots
The worst thing you can do (at least one of the worst) is to simply turn your camera on, point it at a subject, and let it run on and on. A good video project should have a variety of camera shots. This keeps the viewer interested, allows the director to visually draw attention to important details, and generally helps the flow of the video.
When writing your script (or storyboard), you have two things to work with: picture and sound. While writing narration or dialog (sound) the scriptwriter also needs to visualize what video (pictures) will be on the screen.
Here are several camera shots, the shorthand used in scriptwriting, and some uses for each.
Long Shot (LS):

The long shot is sometimes called an establishing shot. The beginning of a scene is usually a long shot, because that establishes where the scene is taking place. For example, a video shot in the classroom might open with a long shot of the entire classroom, to tell the viewer this is where we're going to be for the next few minutes.
Long shots are good for: illustrating the setting of a scene
Bad for: showing details or holding the viewer's interest for a long time
Medium shot (MS):

A medium shot is a little closer, a little more intimate with the subject. If we go back to our example, after opening your classroom video with a LS of the entire classroom, we might now cut to a M'S of the teacher as he speaks to the class. By the way, the above shot might also be called a "One Shot" because we see one person.

Of course, that would make this MS a "Two Shot." I'm sure you can figure out why.
Medium shots are good for: drawing attention to a person or object without revealing many details.
Bad for: A medium shot is a compromise. As such, it does a good job for a lot of things, but not for revealing detail.
Close Up (CU):
Close ups are when we get up close and personal with the subject or item we wish to illustrate. The close up is the director's way of pointing out something interesting, or essential to the plot, without any other visuals distracting the viewer.
Back to that classroom video for an example. We open with the LS of the classroom, then cut to a MS of the teacher talking about how important keyboarding skills are. At this point, we might show someone in CU typing on the keyboard while the teacher talks.
Good for: drawing attention to important detail. Also good for cutting away from the action to allow the editor to cut two takes of a scene together.
Bad for: establishing scenes.
Extreme Close Up (ECU):

The extreme close up draws attention to something by getting extremely close. In this case, it has to be essential to the plot development, and it has to be approached gradually. If Sue has a new class ring, we can't go directly from a MS of Sue talking about her ring to an ECU of the ring; that is too jarring to the viewer. You have to work your way to getting closer to the ECU.
Like this:
LS classroom
MS teacher talking about keyboarding
CU Sue typing on keyboard
MS teacher saying that the new class rings are available and that some students already have one
ECU Sue's hand wearing ring as she types
The ECU is good for: extreme detail when important to the plot
Bad for: everything else
When deciding on what shots to use, try to imitate the human eye and how it works with the brain to receive and interpret information. If you walked into a classroom, the first thing you would do is look around. In effect, your eye is getting an "establishing shot" or LS of the classroom. If the teacher is speaking to the class, you'd probably look at the teacher next. That is your MS, and probably a "one shot" as well. As the teacher mentioned keyboarding, you might look at someone typing on a keyboard, and your eye sees a CU of hands on a keyboard. And so on.
Watch a television show, preferably a scripted show rather than a "reality" show. Identify the various camera shots you see: LS, MS, CU, ECU, one shot, two shot. See when they are used in the script and what effect they have on telling the story.
When writing your script (or storyboard), you have two things to work with: picture and sound. While writing narration or dialog (sound) the scriptwriter also needs to visualize what video (pictures) will be on the screen.
Here are several camera shots, the shorthand used in scriptwriting, and some uses for each.
Long Shot (LS):

The long shot is sometimes called an establishing shot. The beginning of a scene is usually a long shot, because that establishes where the scene is taking place. For example, a video shot in the classroom might open with a long shot of the entire classroom, to tell the viewer this is where we're going to be for the next few minutes.
Long shots are good for: illustrating the setting of a scene
Bad for: showing details or holding the viewer's interest for a long time
Medium shot (MS):

A medium shot is a little closer, a little more intimate with the subject. If we go back to our example, after opening your classroom video with a LS of the entire classroom, we might now cut to a M'S of the teacher as he speaks to the class. By the way, the above shot might also be called a "One Shot" because we see one person.
Of course, that would make this MS a "Two Shot." I'm sure you can figure out why.
Medium shots are good for: drawing attention to a person or object without revealing many details.
Bad for: A medium shot is a compromise. As such, it does a good job for a lot of things, but not for revealing detail.
Close Up (CU):

Close ups are when we get up close and personal with the subject or item we wish to illustrate. The close up is the director's way of pointing out something interesting, or essential to the plot, without any other visuals distracting the viewer.
Back to that classroom video for an example. We open with the LS of the classroom, then cut to a MS of the teacher talking about how important keyboarding skills are. At this point, we might show someone in CU typing on the keyboard while the teacher talks.
Good for: drawing attention to important detail. Also good for cutting away from the action to allow the editor to cut two takes of a scene together.
Bad for: establishing scenes.
Extreme Close Up (ECU):
The extreme close up draws attention to something by getting extremely close. In this case, it has to be essential to the plot development, and it has to be approached gradually. If Sue has a new class ring, we can't go directly from a MS of Sue talking about her ring to an ECU of the ring; that is too jarring to the viewer. You have to work your way to getting closer to the ECU.
Like this:
LS classroom
MS teacher talking about keyboarding
CU Sue typing on keyboard
MS teacher saying that the new class rings are available and that some students already have one
ECU Sue's hand wearing ring as she types
The ECU is good for: extreme detail when important to the plot
Bad for: everything else
When deciding on what shots to use, try to imitate the human eye and how it works with the brain to receive and interpret information. If you walked into a classroom, the first thing you would do is look around. In effect, your eye is getting an "establishing shot" or LS of the classroom. If the teacher is speaking to the class, you'd probably look at the teacher next. That is your MS, and probably a "one shot" as well. As the teacher mentioned keyboarding, you might look at someone typing on a keyboard, and your eye sees a CU of hands on a keyboard. And so on.
Watch a television show, preferably a scripted show rather than a "reality" show. Identify the various camera shots you see: LS, MS, CU, ECU, one shot, two shot. See when they are used in the script and what effect they have on telling the story.
Tuesday, August 24, 2010
Primer Junta Agosto 21 & Pendientes
PUNTOS A TRATAR:
En esta junta se explico lo que es el proyecto y la manera que hemos de organizarnos aleatoriamente para elegir directivos y repartir secciones blocke a blocke.
Se acordaron las fechas de juntas y entradas de informacion a este blog que seran los Lunes.
Conferencia en Linea: Miercoles
Junta en vivo :Sabado o Domingo
PUNTOS PENDIENTES:
- Miercoles :
- Elegir Logo y nombre para Proyecto
- Estilo de programa (repetitivo y catchy)
- Intro y musica para intro y outro y cuts de en medio (repetitivo y catchy)
- Leer Taller de Produccion y familiarizarse con este blog
- Elegir fecha de Entrevistas
- Fijar proxima Junta
- Repasar puntos pendientes para la proxima reunion
- como presentar secciones en especial la rosa y morada
Research Pendiente:
- Reportaje Cambio de sexo
- Tener scripted y en story board nuestras secciones asignadas de la seccion morada
- Grabar intro's
- Tener listo la libreria de sonidos y estilos para editar el programa
- Seccion rosa Script y Storyboard
Ultima Revision de Blocke
Blocke #1 Tema General : Mas que letras
Elegir Intro
---Visual--- ----Nombre de Seccion---- ----Blocke 1
Seccion Verde: El Escenario [ Entrevista con profesor de SD State sobre poetas generacion 27]
Falta editarlo y grabar intro
Seccion Azul:
Lo Basico [Cambio de Sexo Primera parte]
Falta research,storyboard,filmarlo y editarlo
Seccion Rosa:
Eskina Rosa [Todos saben que soy gay menos yo]
Elegir que tipo de presentacion sera(sketch/ilustracion/historia/entrevistas/etc)
Filmarlo,editarlo
Seccion Morada : Arte Interno [Basado en Tema general ' Mas que letras'(Se recomienda la pelicula de Antes de que anochezca-asignado a Armida, se recomiendan tres canciones de soundtrack de almodovar - asignado a Sandra, Anime fue anulado por voto :( en su spot se recomendara un grupo teatral llamado las reinas chulas- asigned to mirna Libros de poesia lesbica asigned to Nadia)]
Falta reunirlo y grabarlo deacuerdo al estilo elegido
Seccion Amarilla: La Calle [ El Pasaje Rodriguez (Gafografo, las hijas de el cuarto oscuro y el monchis ) ]
Falta hacer negociaciones diplomaticas pero ya estan de acuerdo, filmar y buscar lugar cercano para monchis , editar
Seccion Roja: La voz de el pueblo ( Espacio de expresion para el publico que quiera contribuir con su parte basandose en el tema aqui tambien damos un adelanto de los temas de el proximo blocke) [ en esta solo la promocionaremos y explicaremos como hacerla y daremos adelanto de siguiente blocke]
Falta hacer script grabarla y editarla
El proyecto


INAGURACION


Este sabado 21 de agosto inaguramos la primer junta oficial de el tan nombrado proyecto de expresion urbana sin nombre por el momento...
El equipo esta conformado por:
Armida Gomez
Nadia Tapia
Sandra Cordova
Mirna Vargas
PROYECTO
Este proyecto es un canal de Youtube con una gran recopilacion de imagenes,vivencias olores y sabores de la vida frontereriza. Transmitiendo desde Tijuana, Tecate Y San Diego.
Promovemos la cultura local dandole un especial enfoque a la comunidad LGBT.
Presentando 6 diferentes secciones que seran subidas mes a mes con una gran variedad de temas.
aun estamos decidiendo en nuestro estilo e imagen mas definida y estable.
Este proyecto nació por falta de videos locales en YouTube
Como ya es de saberse un gran porcentaje de la población a emigrado a consultar lo que necesiten saber, interactuar en redes sociales, leer blogs o simplemente mirar, criticar, curiosear videos en YouTube y nosotros nos hemos agregado a la lista.
Hemos creado este canal para que la comunidad se identifique y quizás les pueda servir uno que otro consejo o simplemente pasar el tiempo.
Nuestra meta es compartir lo que vivimos y sabemos a todo quien nos mire y sobretodo busque contenido local y gay.
Igualmente trataremos de fomentar la regla numero uno para todos los inconformes…
Si no les gusta cámbiele de canal…y si les gusta pues súbele el volumen por que no solamente hablamos de temas gays si no de todo lo que nuestra generación quiere necesita y busca saber...
Queremos hacer inca pie en que nuestro contenido va a ser tan variable que no justamente refleja lo que todos creemos, pensamos o representamos, no apoyamos un solo punto de vista; tratamos de mantenernos neutros dentro de nuestros límites y más que nada no creemos en la censura, manejaremos este canal sin mucha prohibición de temas, aprovechando que aun no tenemos privatización en internet seremos libres de crear y transmitir temas abiertos.
ADMINISTRACION Y ORGANIZACION
Conformado solo por mujeres con bases y talentos diversos sobre todo muchas ganas hemos formado conforme pasa el proyecto ciertas bases y acuerdos para tener una oraganizacion y sistema.
Los temas son escojidos dependiendo en el tema general de el mes y consiste de seis secciones que seran repetidas por blocke.
Un tema por mes es propuesto y votado y de ahi se basan las secciones al igual son votados por mayoria y los puestos principales de direccion son escojidos y asignados segun la especialidad y facilidad para poderse efectuar.
-Juntas
Las juntas seran programadas los viernes para que sean hechas los sabados o domingos
Un taller de algun tema que necesite ser aprendido o explicado para poder seguir con el proyecto sera publicado en este blog al igual que un reporte semanal y pendientes.
tendremos conferencia en linea los miercoles
PROGRAMACION
--Blockes:
Cada mes sera subido un programa entero a youtube con duracion aproximada de 60-90 minutos y esta misma se le denomina como un blocke donde se le escoje un nombre general para basarse las subcategorias en las secciones.
-Secciones
Las secciones son 6 segmentos especializados constantes con duracion maxima de 15 minutos seran subidas a youtube individualmente se identifican visualmente por 6 colores y sus nombres explican su objetivo
Blocke #1 Tema General : Mas que letras (varia segun el mes)
---Visual--- ----Nombre de Seccion----
Seccion Verde: El Escenario (Entrevistas, Individuos explicando su especialidad)
Seccion Azul: Lo Basico (Tramites Legales, Tutoriales, How to's)
Seccion Rosa: Eskina Rosa (Gay related media, coming out stories, consejos, experiencias usando todo tipo de expresion artistica )
Seccion Morada : Arte Interno (recomendaciones de musica, libros, arte, peliculas, etc hechas por nosotros basandonos en el tema general de el blocke)
Seccion Amarilla: La Calle ( lugares donde ir, monchis, eventos, tokadas, recomendaciones para salir)
Seccion Roja: La voz de el pueblo ( Espacio de expresion para el publico que quiera contribuir con su parte basandose en el tema aqui tambien damos un adelanto de los temas de el proximo blocke)
BlogZine
Ya que tendremos que hacer todo en graficas visuales tenemos la mayor parte realizada para publicar el complemento de nuestro proyecto que es un blogzine el cual es como una revista electronica que se subira a un blog como este; conteniendo un poquito de informacion extra como links y contacto para los entrevistados o recomendaciones que haremos por video.
el punto de este es tener mas hits (visitas en la pagina) para ir preparando el E-marketing que se planea a futuro para el proyecto.
Comunicacion y Recursos
Todo el equipo se va a hacer un experto y ganara experiencia invaluable en medios de comunicacion.
para poder tener una mejor comunicacion tendremos que hacer cuentas y probar programas para realizar nuestra comunicacion mas efectivamente
por el momento aqui subire el calendario general donde todos tendremos acceso para modificar y podremos consultar con nuestros proximos compromisos y asi podremos ver nuestra disponibilidad y pendientes.
el calendario en linea que estara aqui se llama 30Boxes
tendremos que hacer dos cuentas en las siguientes direcciones para poder tener una buena comunicacion en nuestras conferencias en linea
Pando.com: que sirve para subir folders grandes con cualquier tipo de contenido y los manda mas rapido y acepta grandes formatos para poder compartirlo entre nosotros.
necesitan bajarlo e instalarlo ( cuidado en no instalar los anuncios que ofrecen es buen programa aunque si tiene muchos comerciales pero solo ignorenlos)
Vyew.com esta pagina es para nuestras conferencias cuando tengamos que mostrar presentaciones o algo en la pantalla nos da mucha accesibilidad para ver lo que todos tenemos en la pantalla mostrar imagenes presentaciones llamadas en conferencia con video y voz.
el skype es opcional si se les hace muy lento el anterior.
les mande por correo la invitacion para usar 30 boxes (el calendario) esa aceptenla si gustan aunque lo podran ver en el blog y no es obligatorio. y les mande otra de multiply.com esa no la acepten o hagan cuenta ya que es lo mismo que pando.com pero es mas especizlizado a fotos y videos y no creo que sea necesario.
asi con estos accesos y este blog nos ahorraremos a checar el correo electronico o revolverlos.
Futuro de este Blog
Nota: este blog cambiara su nombre e imagen una vez que escojamos un nombre estable
iremos usando y probando mejores maneras de comunicacion gracias por su paciencia :)
Adelante Chikas!
Subscribe to:
Posts (Atom)