
A filmar se ha dicho
para filmar necesitaremos orden y un plan tambien desde como tomar la camara y como tener orden en las tomas y tenerlas anotadas
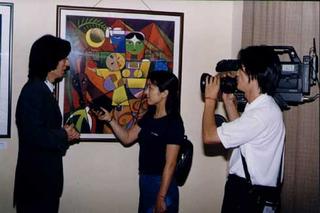
Production (shooting your video)

Here is where the fun really starts. With a script in one hand and a camera in the other, you start actually shooting scenes for your video project.
Some tips will help your shoot go smoother and be more productive. Before the day of the shoot, look at that camera. You need to know how to operate it, and that’s more than just grab, point and shoot. Learn what the buttons do; for gosh sakes, learn how to turn off the day/date indicator. Nothing makes a project look more amateurish than having “August 14, 1987” in the corner of every shot. So, don’t bother setting the correct day and time, just turn that silly feature OFF.
Many cameras shoot in two different speeds, one for best quality and one for lower quality but longer recording time. Right now, I’m looking at a Panasonic miniDV tape that says 60/LP90. That means that it records 60 minutes at full quality, or 90 minutes in the lower quality Long Play (LP) mode. Whenever possible, use the higher quality recording speed setting, that is, the one that uses the tape the fastest. If you’re using a 60/90 minute tape, record at the 60 minute setting. (And since you learned what all the buttons do on your camera like I mentioned in the last paragraph, that will be a snap, right?)
Make sure your camera batteries are fully charged if you aren’t using AC current to power your camera. In fact, find a spare set of batteries and charge them as well.
Are you recording sound? Do you have a hand-held mike that will plug in to your camcorder? From experience, I know that a $20 mike placed close to your subject will sound better than a $100 mike that is 20 feet away. And if you are only using the on-camera mike, well, you are in trouble. Later in this series, I’ll post an article about shooting with the on-camera mike. For now, find a hand-held mike, plug it in to your camera and keep it close to the source of your sound.
Are you using a nice, fluid-head tripod? Whenever possible, use a tripod!
Always use new tapes for your project; it’s a very small investment that will help you succeed. If you are using miniDV tapes, you might want to exercise them first by fast-forwarding all the way to the end, and then rewinding them to the beginning. I’ve found this reduces any “drop-outs” in the picture.
When you are shooting video for later editing, you have two tricks up your sleeve.
1. You can shoot more than one take of a scene. That is, you keep doing it until you get it right.
2. You can shoot out of sequence. For instance, if you are doing a TV newscast, you can shoot the sports first and put that scene in the proper part of the newscast during editing.
All right. You are out in “the field” with your actors, your camera operator, and somebody to help haul everything around. You have a well planned script with every camera shot written down or storyboarded.
Here are some camera operator tips.
A. Frame your shot. Zoom in or out to frame the shot you want.
B. Pre-roll on each shot. Let camera roll 10 seconds before action starts.
C. Identify each take while the camera is rolling. "This is Take 1" “This is Take 2” etc. Use a clapboard for this, as well as having someone say it out loud.
D. Hold it! Keep your shot for at least 20 seconds. Don’t shoot tiny snippets of action.
E. Don't pan and zoom unnecessarily.
F. Keep the mike close to the subject, so you can hear them.
G. Post-roll on each shot. After the shot is done, let camera roll for at least another 10 seconds before stopping.
Pre-roll and post-roll are essential! Every time you start that camera, let the tape roll at least ten seconds before the action starts. And let that tape roll an additional ten seconds after the action stops before you stop recording.
If you decide that Take 3 is the best take of the first scene, Take 2 is the best of the second scene, and Take 8 is the best of the third scene, be sure to write that down on your script. Why do we have each scene identified with a “take number? When you are editing, it makes it easier to assemble your project in post production.
As an example of how easy this makes editing; imagine editing a scene into our project. Which take do we use on this particular scene? Take 3 because I wrote that down on my script. How do I identify Take 3? It’s right there on the clapboard at the beginning of the scene.
Hand holding your camera
There are some times that you just can't use a tripod while you're shooting video. Here are some techniques to get the best possible footage while hand-holding your camera.
The primary rule of a hand held shot is DON'T USE THE ZOOM. A zoom lens magnifies the image...it also magnifies any camera movement or shake. So, instead of zooming in to fill the viewfinder, zoom back and get very close to your subject.
This has another benefit. If you are hand holding the camera, zoomed back to a wide angle setting, and are a couple of feet away from your subject, then you can capture very good audio with just the on-camera mike. I've seen professional TV ENG crews doing simple interviews like this.
If you can't get close to your subject and don't have a tripod, there are a couple of tricks you can use. Wherever possible, set the camera down on something--a wall top or railing, a table or
bookcase--any horizontal surface. To see what you're shooting, angle the viewfinder upward so that you can look through it .
If you can't steady your camera by one of these methods, try to brace yourself as you hand-hold it. Again, lean against a vertical support or prop your elbows on any handy horizontal surface. For low angles, try kneeling rather than squatting.
Here are some other good hand-holding techniques. Such as:
The primary rule of a hand held shot is DON'T USE THE ZOOM. A zoom lens magnifies the image...it also magnifies any camera movement or shake. So, instead of zooming in to fill the viewfinder, zoom back and get very close to your subject.
This has another benefit. If you are hand holding the camera, zoomed back to a wide angle setting, and are a couple of feet away from your subject, then you can capture very good audio with just the on-camera mike. I've seen professional TV ENG crews doing simple interviews like this.

If you can't get close to your subject and don't have a tripod, there are a couple of tricks you can use. Wherever possible, set the camera down on something--a wall top or railing, a table or
bookcase--any horizontal surface. To see what you're shooting, angle the viewfinder upward so that you can look through it .
If you can't steady your camera by one of these methods, try to brace yourself as you hand-hold it. Again, lean against a vertical support or prop your elbows on any handy horizontal surface. For low angles, try kneeling rather than squatting.
Here are some other good hand-holding techniques. Such as:
Hold the camera with both hands, elbows spread away from the body so that they can act as shock absorbers. You can hold your elbows tight at your sides for extra bracing.
If the shot won't run very long, hold your breath. Take a deep breath, let half of it out, then hold the rest and shoot.
If you pan the camera, stand with your feet parallel to the middle of the movement, then twist your upper body back until you can frame the beginning.
Remember, shoot hand-held footage with the lens at the widest angle setting you can. Remember that wide angle lenses tend to minimize the effects of camera shake.
ORGANIZACION EN ANOTAR LAS TOMAS
Multiple takes & logging while shooting
When working on a video project, I always go through the three basic steps:Pre-production (planning)
Production (shooting)
Post-production (editing)
The key to success in a video production is organization. And I'm a rather disorganized person, so I'd like to skip that part and just keep all that information "in my head." But I've learned the hard way that a little organization during the planning and shooting stages makes life a lot easier when it comes time to edit.
In class, I always do a simple demonstration of logging an interview while taping it, to show students some techniques that make the whole process easier. It goes something like this:Ed: "I need two students to help with this demo." And I grab a couple at random, asking them to come to the front of the class with me.
Ed: "All right, we're shooting an interview with Jenny. I'll have her stand in front of the camera, and Bret will be my gaffer." With this, I hand Bret a pencil and paper.
Ed: "Every videotape that I shoot needs a name. We'll label this tape as 'Jenny.' So I want Bret to write 'Jenny' at the top of his piece of paper. This is our Tape Log."
Bret writes this down and waits for further instructions."I'll start the camera rolling. Remember that we need 10 seconds of pre-roll before the action starts. While the camera is rolling, I'll ask Jenny to say and spell her full name."
Jenny looks at the camera and says, "Jenny Jones. J-e-n-n-y J-o-n-e-s."
Ed: "Very good. Jenny, I'd like you to hold up one finger, because this is Take One of the interview." Remember that the camera has been rolling during this.
Jenny holds up one finger for a minute. We're ready to start."All right, everyone 'stand by." This is Take One, coming in 5-4-3-2...."
And I don't say "one" because I want a moment of silence there before we begin.
I ask Jenny a couple of questions, and then I cough or clear my throat while she gives me her reply. Ah. A ruined take. I look at Jenny and say:Ed: "I'm sorry. Guess I messed up that take. So Bret, would you write down 'Jenny interview Take 1, no good.'"
Bret does this and we continue.Ed: "Note the camera is still rolling. Tape is cheap, so we don't bother stopping the camera or rewinding the tape between takes. Jenny, please hold up TWO fingers, so we know this is Take 2."
She does so. Bret writes down "Jenny interview Take 2" on his paper.
We do another take of the interview, and we successfully complete it. I look at Jenny and Bret.Ed: "Were you happy with that take? Was that all right?"
They think it was fine.Ed: "OK. The camera is still rolling, and we know it's been at least 10 seconds since Jenny finished. I'll turn the camera off, and I'd like Bret to mark 'OK' next to 'Take 2' on his log sheet."
Bret does so, and I thank both students as they go back to their desks.Ed: "Class, when we've finished shooting everything, we'll take a big stack of tapes into the editing suite to begin putting this project together. At some point, we'll look at our script and want that interview of Jenny."
Ed: "Where do we find it?"
And the students reply, "On the tape labeled 'Jenny.'"
"What take do we want to use?"
Students: " Take 2."
Ed: "And how do we know that?"
Bret: "Because I wrote it down."
Ed: "How do we know which take is Take 2?"Jenny : "Because I held up two fingers while you were taping to show it was Take 2."
If you use the technique of logging your takes and selecting the "good" take while you shoot it, you save a lot of effort and frustration when it's time to transfer the good stuff to your editor.
No comments:
Post a Comment